PicoDeliver
A robotic message and small item delivery system
Author: Sofiia Huzhan
GitHub Project Link: https://github.com/UPB-PMRust-Students/project-demesup
Description
PicoDeliver is a robotic system that delivers messages and small items within a local area. Messages can be entered either through the device's display interface or via a web interface. The robot wanders around. When the recipient, and when they signal their presence through the website, the robot stops to deliver its payload.
Motivation
I built this because robots are cool. There’s something satisfying about making a machine move, react to sensors, and follow commands. It’s like bringing code to life, and that never gets old.
But beyond just fun, I wanted something more personal than another phone notification. Why text my roommate "Where’s the charger?" when a little robot could deliver the message instead? It’s playful, practical, and a great way to learn.
Architecture
1. Raspberry Pi Pico (Pico #1)
Role: Main microcontroller (brains of the operation)
Interfaces:
- GPIO (Digital I/O)
- SPI (for display)
- WiFi (TCP communication)
Functions:
- Reads inputs from sensors (IR, ultrasonic, buttons)
- Controls motors through the motor driver
- Displays data on the SPI screen
- Communicates with a web application
Connections:
- GPIO → Motor Driver (control signals)
- GPIO ← IR Proximity Sensors, Ultrasonic Sensor, IR Receiver, Buttons
- SPI → Display
- WiFi ↔ Web App (bidirectional)
- Power Input ← Battery (5V via Power Supply Module)
2. Motor Driver (L298N or compatible)
Role: Amplifies control signals to drive motors
Interface:
- GPIO (from Pico)
- Vin (12V power input)
- Motor output channels
Functions:
- Converts low-power signals into high-current motor commands
- Controls motor direction and speed
Connections:
- GPIO ← Pico (control pins)
- Vin ← Battery (12V power input)
- Output → Left and Right Motors
3. IR Proximity Sensors (Left and Right)
Role: Detects nearby objects for navigation or avoidance
Interface: GPIO
Functions:
- Emits IR light and senses reflections
- Provides distance indication
Connections:
- Signal → Pico GPIO
- Power and Ground → Power Supply
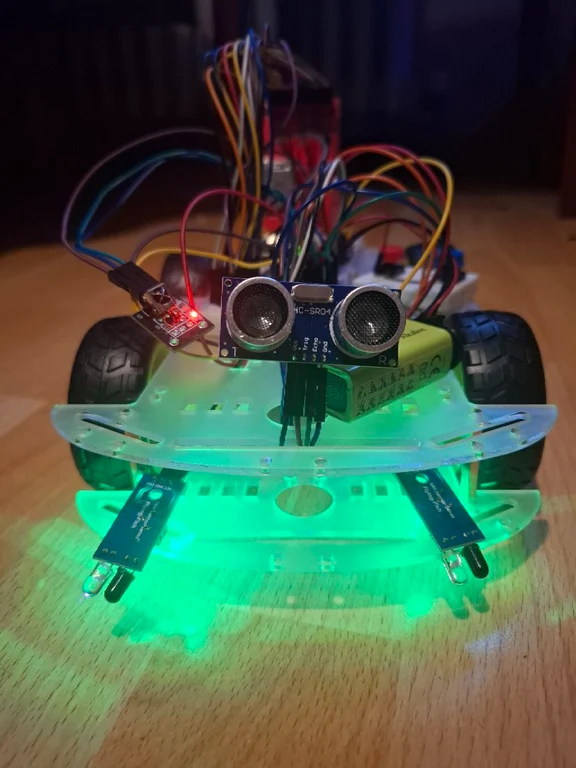
4. Ultrasonic Sensor (HC-SR04)
Role: Measures distance to obstacles
Interface: GPIO (trigger and echo pins)
Functions:
- Sends ultrasonic pulse and receives echo
- Calculates distance based on echo time
Connections:
- Trigger → Pico GPIO
- Echo ← Pico GPIO
5. IR Receiver
Role: Receives commands from remote control
Interface: GPIO (digital)
Functions:
- Receives modulated IR signals
- Decodes remote control button presses
Connections:
- Signal → Pico GPIO
6. Buttons (Red and Blue)
Role: Manual input for control
Interface: GPIO (digital)
Functions:
- Allows easier interction with the robot
Connections:
- Signal → Pico GPIO
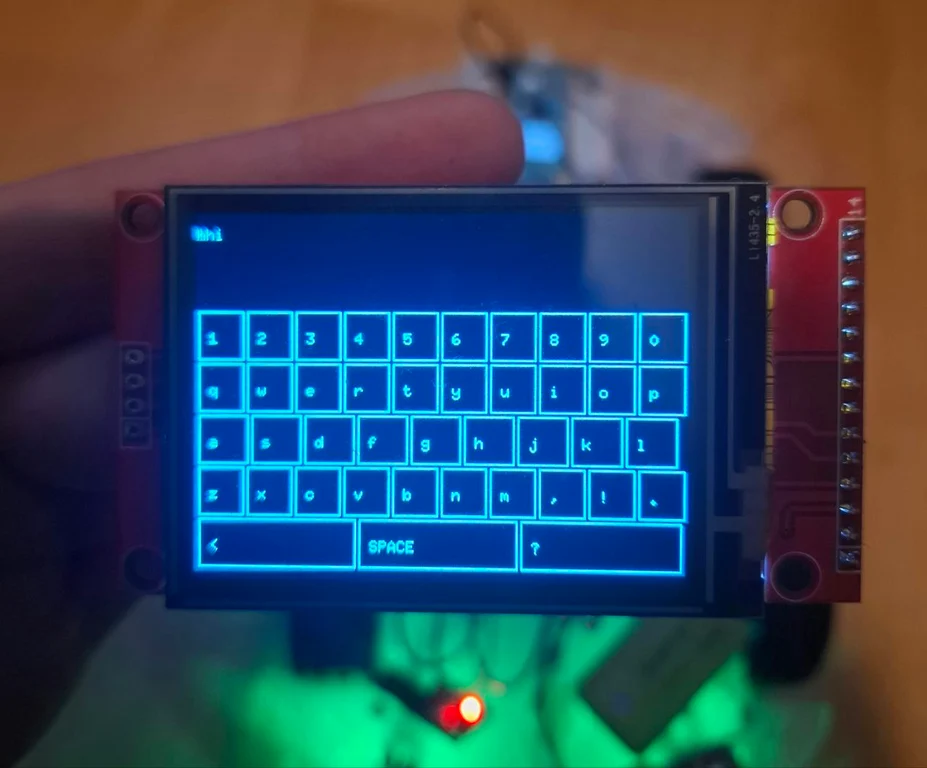
7. Display (SPI)
Role: Provides visual feedback
Interface: SPI (MOSI, SCK, CS)
Functions:
- Displays sensor values, status indicators, menus, keyboard
Connections:
- SPI Lines ← Pico
8. Web App
Role: Enables remote control and monitoring
Interface: WiFi (TCP/IP)
Functions:
- Sends control commands to Pico
- Receives real-time sensor data
Connections:
- WiFi ↔ Pico (TCP communication)
9. Power Supplies
- Pico: Powered by a battery via Power Supply Module
- Motor Driver: Powered directly from 12V battery
Log
Week 5 - 11 May
After receiving the components, I tested their functionality and researched compatible software libraries for my hardware setup. Once verified, I proceeded with system design.
Week 12 - 18 May
Week 19 - 25 May
Hardware
Component Details
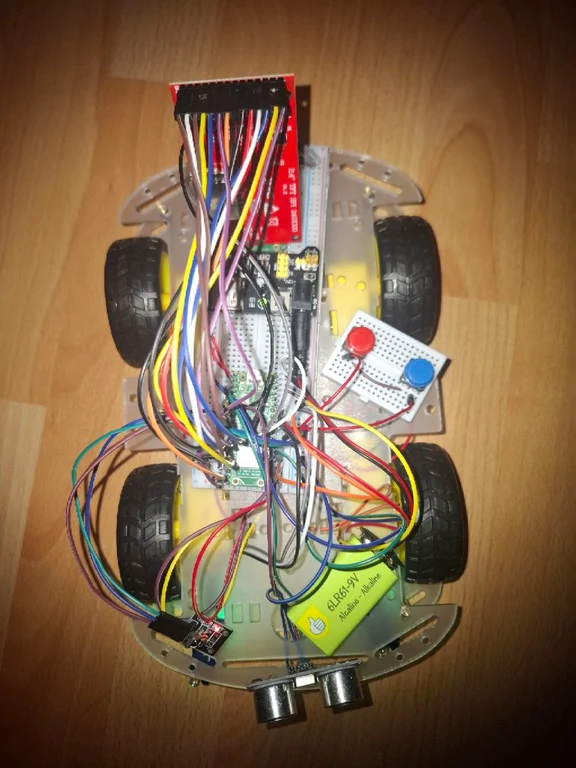
- Raspberry Pi Pico 2W: The brain of the operation, running all control logic
- DC Motors: 4 gearmotors providing wheel movement (2 per side)
- L298N Driver: Powers and controls motor speed/direction
- Infrared Sensors: Left/right obstacle detection (reflectance sensors)
- Ultrasonic Sensor: Front-facing distance measurement (2cm-400cm range)
- TFT Display: 2.4" color screen with touch input for user interface
- IR Receiver: Decodes signals from standard remote controls and transfers to the pico
- Buttons: Physical input for selection
- Dupont Wires: Jumper cables for all electrical connections
- Chassis: Frame holding all components


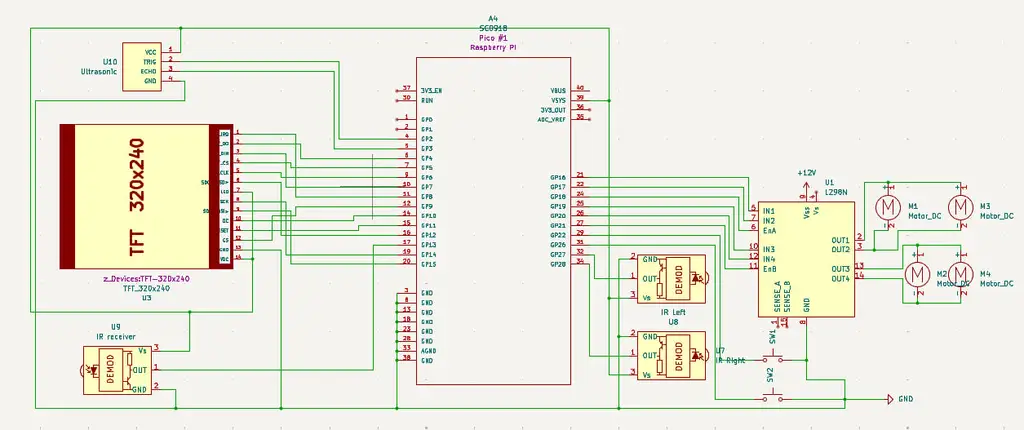
Schematics
Here is the KiCad schematics

Bill of Materials
| Device | Usage | Price |
|---|---|---|
| Raspberry Pi Pico 2W *2 | Microcontroller board | 39.66 RON each(79.32 RON total) |
| DC Motor (×4) | Wheel drive motors | ~7 RON each (28 RON total) |
| L298N Dual Motor Driver Module | Motor control | 10.99 RON |
| Infrared Obstacle Sensor (×2) | Object detection | 3.49 RON each (6.98 RON total) |
| HC-SR04 Ultrasonic Sensor | Distance measurement | 39.66 RON |
| 10cm Dupont Wires (40-pin) | Short connections | 5.17 RON |
| 20cm Dupont Wires (40-pin) | Long connections | 5.99 RON |
| 2.4" SPI TFT Display | User interface | 47.99 RON |
| KY-022 IR Receiver (VS1838B) | Infrared signal reception | 1.99 RON |
| Buttons | User selection | 1.99 RON each(3.98 RON in total) |
| Chasis | Base for the robot | 30 RON |
Software
| Library | Description | Usage |
|---|---|---|
| heapless | Stack-allocated data structures | Creating fixed-size strings for LCD writing |
| embassy-time | Timekeeping for async embedded | Delays, timeouts and scheduling |
| embassy-executor | Async/await executor | Managing concurrent tasks |
| embassy-sync | Synchronization primitives | Inter-task communication and resource sharing |
| micromath | Sensor data processing | |
| fixed | Fixed-point math for sensors | |
| embedded-graphics | 2D graphics primitives and text rendering | Drawing shapes, text and UI elements |
| ili9341 | TFT LCD display driver | Controlling screen output and display settings |
| xpt2046 | Resistive touch controller driver | Handling touch input and calibration |
Links
- Inspiration: Delievery robots
- IR Remote ...
